Showing posts with label pc. Show all posts

Thursday, 9 August 2012

How to Clear Your Data off a Device


If you're recycling your computer, smartphone or tablet, there's one significant problem you may have ignored: If you don't wipe them clear of data, you could become a victim of identity theft. Merely deleting files using normal system tools won't really do the trick --- you need to do a much deeper cleaning. Here's how to do it.
(Note: This article is an update of a previous article that ran in December, 2007; while some of the older information still stands, a lot of other things have changed since then.) (See Related: Hard Drives Exposed)
Cleaning up cell phones, smartphones and tablets
Smartphones and tablets essentially pack your entire life into a small package, including your contacts, emails, records of incoming and outgoing phone numbers, social media information...and more. So you want to make sure that someone else can't get access to all that information.
You could try deleting individual apps and contacts, but the odds of doing that effectively are close to zero. Instead, you want to do a complete reset of your phone to wipe out its data and restore it to its factory settings.
How you do this varies from operating system to operating system, and sometimes even device to device. These are general instructions that should work with most devices; however, it's best to check with your manual or manufacturer just to make sure.
Android: For versions before Android 4.0, press the Menu key from the Home screen and select Settings/Privacy/Factory data reset. You'll get a warning screen. Scroll toward the bottom and tap "Reset phone." If you also have an SD card in the phone (and don't want to use the data in your next phone), also make sure to check the box next to "Erase SD card."
Image Credit: iFixItFor Android 4.0 or later, go to Settings and look for "Backup and reset." Tap that, and then, on the next screen, tap "Factory data reset." You'll get a warning screen along with a list of all the accounts you are currently signed into.
iOS: Go to Settings/General/Reset and then tap "Erase all Content and Settings." (This is specifically for Version 5; the process may differ slightly for other versions.)
Windows Phone 7: Go to the Home screen, then tap the Application Menu Key and select Settings/ System/About/ and tap the "Reset your phone" button.
BlackBerry: Head to Options/Security options/General settings, and then tap menu. Then select Wipe Handheld.
Wiping computer hard drives
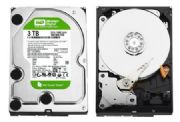
Deleting files, folders and applications -- and clearing the data from the Recycle Bin -- won't do the trick if you're going to recycle your computer. Anyone can easily recreate that data using commonly available tools. Even if you reformat your hard disk, if someone really puts their mind to it they can recreate the deleted data.
This can be a serious problem. Back in 2003, two graduate students at MIT's Laboratory for Computer Science bought 158 used hard disks from eBay and other sources.
Only 12 of the drives had their data properly cleaned. Even though approximately 60% of the hard drives had been reformatted and about 45% had no files on them (the drives couldn't even be mounted on a computer), the students were still able to recover data from them, using a variety of special tools. They found over 5,000 credit card numbers, personal and corporate financial records, medical records and personal e-mails.
What can you do to keep your data safe? Get a disk-wiping program, preferably one that meets the U.S. Department of Defense's Media Sanitation Guidelines. These programs will overwrite your entire hard disk with data multiple times, ensuring that the original data can't be retrieved. If you use them, be patient, because it can take several hours to wipe the hard disk.
One well-known free application that meets the DoD's standards, according to Auburn University, is Darik's Boot and Nuke. The software creates a boot disk that wipes everything on the hard drive. It can also be used with floppy disks (remember those?), USB flash drives, CDs and DVDs.
Another free Windows utility that also meets the DoD's standards is Eraser.
If you've got a Mac, you can use Apple's built-in Disk Utility (it can be found in the Applications/Utility folder). You can also download a third-party application like Mireth Technology's ShredIt X ($25, free trial available), which lets you shred files (in other words, overwrite the contents of a file multiple times) as well as wipe your local hard drive, network hard drives and CD-RWs. (There's a Windows version as well.)
If you're truly nervous, there are hardware devices available that let you sanitize your drives such as Drive eRazer Ultra. Or you can pull the disk from your PC and send it to a hard drive shredding service that will physically destroy the drive.
(For a more tongue-in-cheek view of how to cleanse a hard drive, check out this old-but-still-good story: Removing hard drive data -- the YouTube way.)
Once you've wiped your device clean, it's safe to sell, donate or recycle your equipment. Find out how to do it in our article How to recycle your phone, PC and other tech gear.
Preston Gralla is a contributing editor for Computerworld.com and the author of more than 35 books, including How the Internet Works (Que, 2006).

How to Clear Your Data off a Device


If you're recycling your computer, smartphone or tablet, there's one significant problem you may have ignored: If you don't wipe them clear of data, you could become a victim of identity theft. Merely deleting files using normal system tools won't really do the trick --- you need to do a much deeper cleaning. Here's how to do it.
(Note: This article is an update of a previous article that ran in December, 2007; while some of the older information still stands, a lot of other things have changed since then.) (See Related: Hard Drives Exposed)
Cleaning up cell phones, smartphones and tablets
Smartphones and tablets essentially pack your entire life into a small package, including your contacts, emails, records of incoming and outgoing phone numbers, social media information...and more. So you want to make sure that someone else can't get access to all that information.
You could try deleting individual apps and contacts, but the odds of doing that effectively are close to zero. Instead, you want to do a complete reset of your phone to wipe out its data and restore it to its factory settings.
How you do this varies from operating system to operating system, and sometimes even device to device. These are general instructions that should work with most devices; however, it's best to check with your manual or manufacturer just to make sure.
Android: For versions before Android 4.0, press the Menu key from the Home screen and select Settings/Privacy/Factory data reset. You'll get a warning screen. Scroll toward the bottom and tap "Reset phone." If you also have an SD card in the phone (and don't want to use the data in your next phone), also make sure to check the box next to "Erase SD card."
Image Credit: iFixItFor Android 4.0 or later, go to Settings and look for "Backup and reset." Tap that, and then, on the next screen, tap "Factory data reset." You'll get a warning screen along with a list of all the accounts you are currently signed into.
iOS: Go to Settings/General/Reset and then tap "Erase all Content and Settings." (This is specifically for Version 5; the process may differ slightly for other versions.)
Windows Phone 7: Go to the Home screen, then tap the Application Menu Key and select Settings/ System/About/ and tap the "Reset your phone" button.
BlackBerry: Head to Options/Security options/General settings, and then tap menu. Then select Wipe Handheld.
Wiping computer hard drives
Deleting files, folders and applications -- and clearing the data from the Recycle Bin -- won't do the trick if you're going to recycle your computer. Anyone can easily recreate that data using commonly available tools. Even if you reformat your hard disk, if someone really puts their mind to it they can recreate the deleted data.
This can be a serious problem. Back in 2003, two graduate students at MIT's Laboratory for Computer Science bought 158 used hard disks from eBay and other sources.
Only 12 of the drives had their data properly cleaned. Even though approximately 60% of the hard drives had been reformatted and about 45% had no files on them (the drives couldn't even be mounted on a computer), the students were still able to recover data from them, using a variety of special tools. They found over 5,000 credit card numbers, personal and corporate financial records, medical records and personal e-mails.
What can you do to keep your data safe? Get a disk-wiping program, preferably one that meets the U.S. Department of Defense's Media Sanitation Guidelines. These programs will overwrite your entire hard disk with data multiple times, ensuring that the original data can't be retrieved. If you use them, be patient, because it can take several hours to wipe the hard disk.
One well-known free application that meets the DoD's standards, according to Auburn University, is Darik's Boot and Nuke. The software creates a boot disk that wipes everything on the hard drive. It can also be used with floppy disks (remember those?), USB flash drives, CDs and DVDs.
Another free Windows utility that also meets the DoD's standards is Eraser.
If you've got a Mac, you can use Apple's built-in Disk Utility (it can be found in the Applications/Utility folder). You can also download a third-party application like Mireth Technology's ShredIt X ($25, free trial available), which lets you shred files (in other words, overwrite the contents of a file multiple times) as well as wipe your local hard drive, network hard drives and CD-RWs. (There's a Windows version as well.)
If you're truly nervous, there are hardware devices available that let you sanitize your drives such as Drive eRazer Ultra. Or you can pull the disk from your PC and send it to a hard drive shredding service that will physically destroy the drive.
(For a more tongue-in-cheek view of how to cleanse a hard drive, check out this old-but-still-good story: Removing hard drive data -- the YouTube way.)
Once you've wiped your device clean, it's safe to sell, donate or recycle your equipment. Find out how to do it in our article How to recycle your phone, PC and other tech gear.
Preston Gralla is a contributing editor for Computerworld.com and the author of more than 35 books, including How the Internet Works (Que, 2006).
Saturday, 4 August 2012

How to Enhance Your Router With Open-Source Firmware

The stock firmware included on many broadband routers takes advantage of only a fraction of the hardware's capabilities. We explain how to use use powerful open-source firmware to unleash the beast in your router.

Enhance Your Router With Open-Source FirmwareAs the number of connected devices in our homes and offices continues to multiply, the limitations of many consumer-grade broadband routers become increasingly apparent. Not so long ago, many users had just one or two systems connected to the Web through their router. But today, many users have multiple smartphones, tablets, printers, laptops/notebooks, and desktop systems connected to their routers, along with such consumer electronics devices as Blu-ray players, HDTVs, and game consoles.
When a basic broadband router has to juggle so many connected devices simultaneously, bad things can happen. If you're lucky, everything works; but for many routers, the load that the connected devices impose becomes excessive, resulting in poor performance or instability.
One potential solution is a drastic upgrade to open-source firmware that can increase the performance and enhance the stability of many routers, and also add lots of new features.

Prepare Before You Commit

Flashing open-source firmware on a broadband router isn't particularly difficult, but the broad range of routers currently on the market means that the process varies from one device to another. If you decide to give open-source router firmware a try, we strongly recommend that you conduct all of your research and obtain all of the files necessary for completing the task before making a single modification; a little prep work will help ensure that the process goes smoothly.
The crucial first step is to confirm that the firmware you plan to install supports your router. We'll focus on using the excellent, open-source firmware DD-WRT here, but other good options, such as Tomato, are available as well. Though DD-WRT and Tomato aren't related, their device support and installation processes are similar. You can find plenty of information at the DD-WRT website and on the Tomato homepage; in addition, consider running a few Google searches to see what other users' experience has been with using open-source firmware on a particular router. Numerous sites across the Web are devoted to open-source firmware, and it's a good idea to consult a number of them to make sure that users are having good experiences.
If the background check yields positive results, look up your router model on the DD-WRT website's wiki, and grab whatever files are essential for completing the modifications that you'll need to make. You'll probably have to download a couple of firmware files: an initial "mini" version that installs basic functionality; and a final, full-featured version. For the Asus RT-N16 router that we used for our project, we needed both the mini and the full-size files.
At this point, some warnings are in order. First, as noted earlier, installing firmware on routers is not a universal process. You can update some routers via a simple file upload; others require elaborate, multistep procedures. Second, as also noted earlier, you should search for and read any information relevant to your particular router model in the DD-WRT wiki and forum. Third, before starting, you should investigate and learn about any potential recovery procedures for your particular router, in case problems arise. And finally, you should use a hardwired ethernet connection to perform all of the router modifications that we discuss in this article; don't attempt to flash firmware over a wireless connection.

The Installation Process

Now we're ready to walk through the process of installing DD-WRT open-source firmware on an Asus RT-N16 wireless N300 gigabit router. These steps probably won't exactly match those for your router, but typically the steps do entail resetting the router to factory defaults, flashing an initial mini build of DD-WRT, resetting the router again, and then flashing the final or upgraded build of DD-WRT.
Enhance your router with open-source firmware: Asus RT-N16 router.We used an Asus RT-N16 router for our demonstration of installing open-source firmware.
1. Clear NVRAM and restore factory defaults: Assuming that you've already downloaded the required firmware files, you now need to clear the router's NVRAM (where any nonfactory-default settings are stored) and restore the unit's factory defaults. Doing so will minimize the likelihood that a problem will arise during the initial phase of installation.
To perform this step, hold down a reset (or restore) button for a few seconds, or choose the option to restore factory defaults from the Administration menu in the router's Web graphic interface. Our Asus RT-N16 supported both methods, so we chose the hard reset option. We held down the reset button on the back of the device for a few seconds, and waited for the router's power light to start blinking; then we released the button, and let the router reboot.
2. Upload the initial firmware: After the router rebooted, we opened a browser window and accessed the router's Web graphic interface. Some routers (like our RT-N16) automatically launch a configuration wizard the first time you open a browser window after performing a reset to factory defaults. Other routers require you to type the appropriate IP address into a browser--typically 192.168.1.1 or 192.168.0.1--to access the Web interface. Do whatever your router requires for this step (the information should be available in your router's manual or on the manufacturer's website).
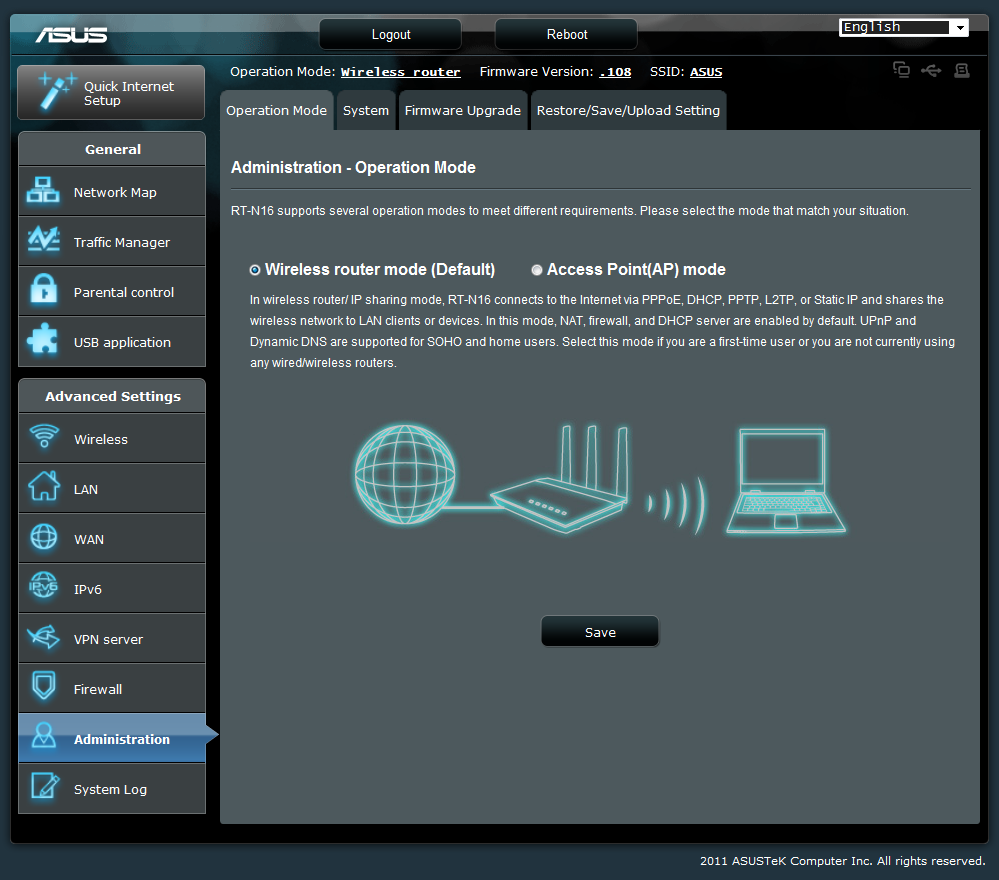
Enhance your router with open-source firmware: Administration menu.After opening your router's graphics interface, navigate to the Administration menu.
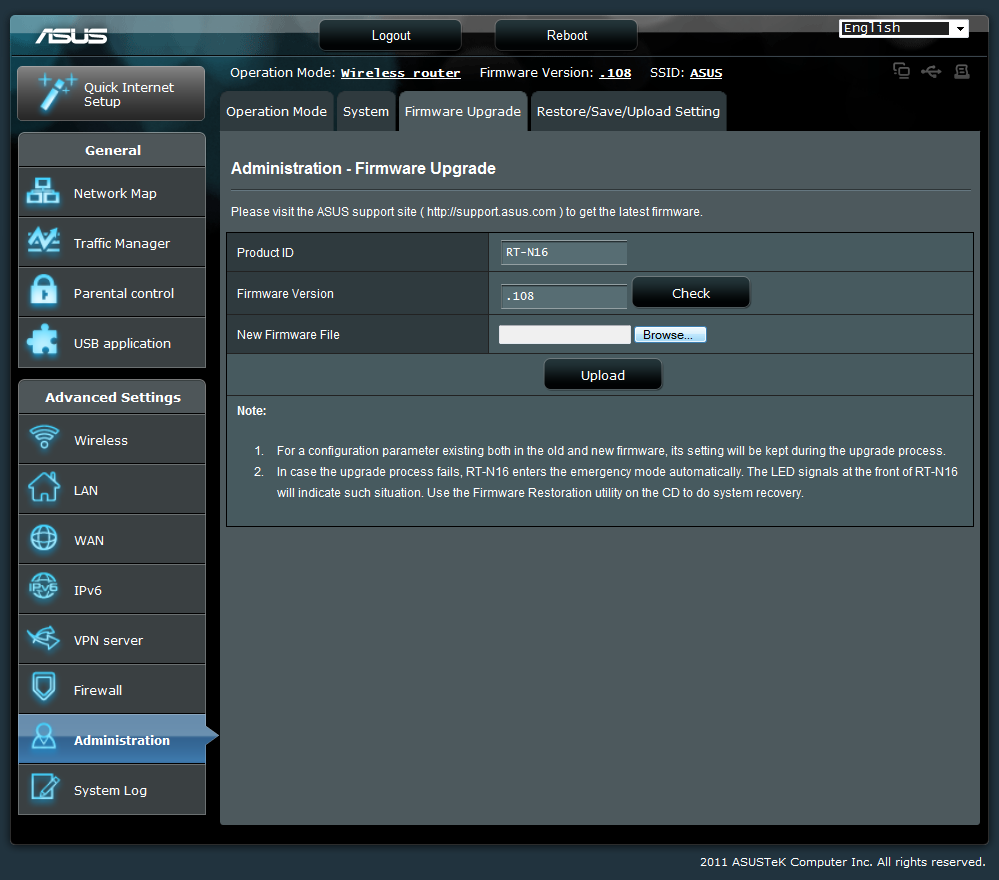
Our RT-N16 automatically launched a configuration wizard, so we simply opened a browser window, and completed a few prerequisites (such as setting a password and a Wi-Fi passphrase) to expose the Web graphic interface's home-screen option. Then, at that home screen, we clicked first the Administration link in the main menu and then the Firmware Upgrade tab at the top of the resulting screen. On the Firmware Upgrade screen, we clicked the Browse button, selected the initial DD-WRT mini firmware file for the RT-N16, and then clicked the Upload button to commence the initial firmware upgrade.
Enhance your router with open-source firmware: installing the mini build.When switching from stock to open-source firmware, you'll probably have to install a mini build first.
After installing the initial DD-WRT mini build, you must let the router reboot on its own and then settle into an idle/usable state. Be patient. You'll know that the router is idle when all of its lights have stopped flashing and your PC has obtained an IP address; the process usually takes a few minutes. When the router is ready, power it off (unplug the power cable if there is no on/off switch), wait a few moments, turn it back on, and then immediately hold down its reset button for a few moments to clear its NVRAM and restore its factory defaults once again.
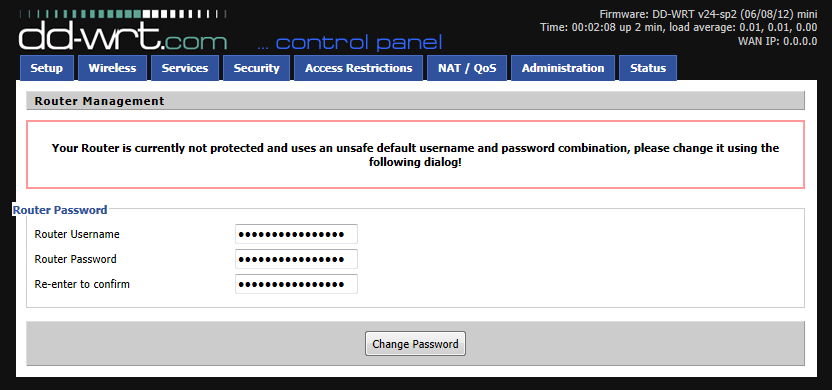
3. Upgrade your version of the firmware: After the initial flash of the DD-WRT mini build and factory reset, you must once again access your router's Web graphic interface. After DD-WRT is flashed onto the device, regardless of how the router behaved before, you'll have to access its Web interface by typing 192.168.1.1 into your browser's address field. The first time you do so after flashing the mini build of DD-WRT, you'll be prompted to set a username and password. You can configure the credentials any way you'd like, but set a username and password that you'll remember, because you'll need them in order to change the router's configuration later, and you won't be able to recover them if you forget what they are. In that case you'll have to reset the router to its factory defaults again, and configure all of its options from scratch.
Enhance your router with open-source firmware: login credentials.DD-WRT's Web graphic interface will prompt you to configure login credentials.
Once you've set the username and password and you have access to the DD-WRT Web graphic interface, it's time to flash the upgraded, full-featured version of DD-WRT. Click the Administration tab at the top of the Web interface and on the resulting menu select the Firmware Upgrade tab. In the Firmware Upgrade menu, select Reset to default settings from the After flashing, reset to drop-down list, and then click the Browse button to find the final/upgraded firmware. Select that file, click the blue Upgrade button at the bottom of the window, and let the upgrade process run its course. This operation usually takes a few minutes to complete, at which point the router will reboot.
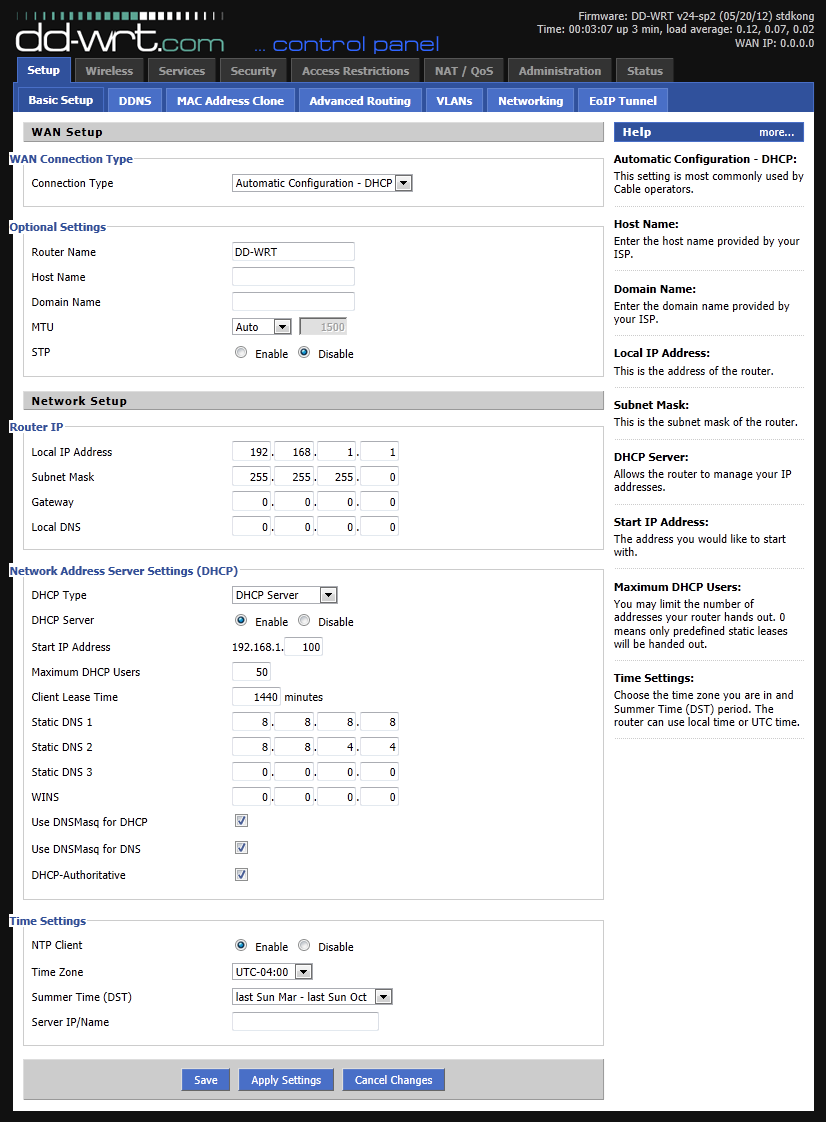
Enhance your router with open-source firmware:DD-WRT tabs and options.DD-WRT clearly labels its tabs and options.
When the router completely reboots, access its Web graphic interface one more time (by typing 192.168.1.1 into your browser). You'll have to set your login credentials again. Then configure your wireless and security settings, along with any other ISP-related requirements, and you're finished.
If you're unhappy with the open-source firmware you've installed, you can always switch back to your router manufacturer's stock version. But we suspect that after enjoying the benefits of open-source firmware, you'll never want to go back to a stock router.
  • See more like this:
  • routers,
  • open source

Apple v. Samsung Highlights Insanity of Tech Patents


Patent litigation has become standard business practice in the tech world, and no rivalry demonstrates that better than Apple and Samsung. The ongoing trial between the two smartphone and tablet leaders is the poster child for all that is wrong with tech patents.
Similar Articles:
  • Apple, Samsung CEOs to Negotiate Patent Dispute
  • Apple Patent Wins: Samsung Tablet Blocked from U.S. and Apple Awarded 27 New Patents
  • 10 Crazy Phone Patents
  • Samsung, HTC Spar with Apple Over Sales Injunction Cases
  • Mobile Patent Wars: A Closer Look at How Everyone Loses
  • Court Delays Apple's Bid To Ban Galaxy Nexus Smartphone
Trolling v. Decency
There’s a term used for companies that buy up patents for the sole purpose of seeking out companies to sue for infringement--they’re called patent trolls. There are also companies that are awarded, and/or acquire patents and subsequently wield those patents against other companies to either stifle competition or extort money in the form of royalties.
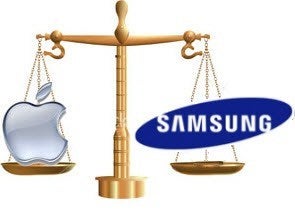
Apple v. SamsungDid Samsung "copy" Apple? Or, did Apple simply "influence" Samsung design?Legitimate tech companies like Apple, Samsung, Google, Microsoft, etc. could help stop the patent litigation insanity by simply exercising some common decency. Don’t apply for patents for obvious or silly features, and only use patent litigation as a tool of last resort for patents that are obviously unique, and egregiously infringed upon.
Suing each other over stupid, silly patents is a waste of resources for the companies involved, and a waste of time for the courts. The only ones who win in most patent infringement trials are the lawyers--and they generally come out ahead whether they win or lose the case itself.
Legality v. Common Sense
To many, the patents being tossed about by Apple and Samsung like cannon fodder are simply ludicrous. Apple has a patent for unlocking the smartphone by swiping? That’s ridiculous. It’s obvious. How else would you navigate a touchscreen interface?
There is a difference however, between whether or not a concept or technology should be patent-worthy, and whether or not an existing patent should be enforceable. Patent offices are overworked and understaffed, and lack the resources to exhaustively research every patent, so it’s possible to invalidate a patent that has already been issued--as a British judge recently did with the swipe to unlock patent.
However, once it’s verified as valid, the patent is legally enforceable no matter how silly it may seem. And, the court--whether a judge or jury--has to consider the merits of whether or not the patent is being infringed without bias for the fact that the patent shouldn’t exist in the first place.
Solving the Problem
While the companies themselves are to blame for using patents as weapons, and resorting to patent litigation as a competitive business practice, it’s the patent system itself that’s broken. Many of the patents issued simply shouldn’t exist.
Legislation has been introduced to try and curb patent trolling. The Saving High-Tech Innovators from Egregious Legal Disputes (SHIELD) Act would force patent litigation plaintiffs to pay the legal costs of the defendant if they lose the case. It’s a step in the right direction because it at least ensures that the plaintiff has some skin in the game, and that patent trolls suffer some consequences for frivolous patent suits.
That isn’t enough, though. Imposing penalties on the back end is like putting a bandage on a cut while you’re still being stabbed. We need a solution on the front end of the patent system to be more discriminating and do a better job of only issuing worthwhile patents in the first place.

Sunday, 24 June 2012

Dell Finally Does An All-In-One PC Right (By Cloning The iMac


xpsone27
Dell has sold various all-in-one computers for years. These systems were mostly insipid, humdrum computers not fit for anything other than being a family’s portal to Facebook. Even with touchscreens, Dell’s all-in-one systems failed to be serious contenders in the space.
Enter the XPS One 27. Announced today and detailed by Engadget, this all-in-one-system is a clone of the iMac. Even the 2560 x 1440 screen resolution is the same. To Dell’s credit, the XPS One 27 ships with Intel’s latest generation of processors while the Apple iMac is still stuck with the older chips — something Apple will no doubt address in the next revision. But it’s hard to ignore the similarities. Hell, even the computer’s support tower has a large hole for cable management a la iMac.
The XPS One 27 is powered by an Ivy Bridge Core i5 or i7 CPU with either an integrated Intel GPU or a 2GB NVIDIA GeForce GT640M dedicated graphics card. With prices starting at $1,399, systems can be configured with up to 16GB of memory and with a 1TB, 2TB or 32GB SSD hard drive. The backside houses four USB 3.0 and two USB 2.0 ports along with HDMI, VGA, and a gigabit Ethernet connection. There’s a slot-loading Blu-ray drive and an optional TV tuner. In all, the XPS One 27 is a fine all-in-one computer with enough power to justify a spot on even an engineer’s desk — too bad Dell didn’t have the design know-how to make an original casing though.
Dell has seemingly given up. At this point in Dell’s anemic life they are just keeping up with Joneses. There was a time when Dell was one of the trusted consumer brands. The firm has never been a design leader with systems more utilitarian than beautiful, but that formula doesn’t work in today’s marketplace. But over the years Dell has managed to release systems like the Adamo XPS and to a less extent, the Dell Streak, that showed the computer company had a bit of life left in its corporate tubes. The XPS One 27 shows the opposite. Dell might be dead.
Lenovo gets it right time and time again. The Chinese PC company consistently releases computers with new designs in novel form factors. Look at the Lenovo all-in-one lineup: Not a single model looks like an iMac while still offering serious computing power. This design-first strategy seems to be working as Lenovo as profits are soaring — something Dell cannot brag about.
There have long been whispers that Dell is looking to exit the consumer business. That division is leading Dell’s losses anyway. And consumers will not miss Dell if the company turns to simply releasing clones of iconic products

Friday, 22 June 2012

Laptops in India with Price - 2012

Laptops in India with Price - 2012

HP Pavillion G6 1301TX

HP Pavillion G6 1301TX
A budget laptop with 2nd Generation Core i3 processor and 1GB Dedicated graphics from HP. Comes with the Windows 7 Basic operating system and Office Starter edition for ready use. 15.6 inch HD LED screen of this laptop with the….
Core i3 - 2350M 2nd Gen.
500GB Hard Disk Drive
2GB DDR3 RAM
15.6 inch HD LED Screen
Windows 7 Basic
1GB Dedicated ATI Radeon

Laptop Price
Rs 34500

Lenovo Z570 59-307664 NB

The Lenovo Z570 59-307664 NB is one of the leading high quality laptop provided with high resolution display screen.  The Lenovo brand is the very popular brand promises you to provide high quality of laptops and notebooks. Among all the….
Core i5 2430M
750GB
4GB DDR3
15.6 Inch LED Display
Windows 7 Home Premium
1GB Dedicated Graphics

Laptop Price
Rs 45800

Lenovo Y460 59033943 NB

The Lenovo Y460 59033943 NB is one of the reliable and well known laptop in market with excellent processor speed. Lenovo provides high quality and portable laptops with great technical features and specification because of which they are very easy….
Core i5 Processor
500 GB
4GB DDR3
14 inch Display
Windows 7 Home Premium
1GB Dedicated Graphics

Laptop Price
Rs 42050

HP Mini 110 -3610TU / 110 -3611TU / 110 -3612TU

HP Mini 110 -3610TU / 110 -3611TU / 110 -3612TU
HP Mini laptops are famous for its quality and high speed processors and beautiful look. Hp laptop comes in different and attractive beautiful colors. The HP Mini  110-3610TU comes in beautiful Sonomared color, The HP Mini 110-3611TU comes in pacific….
Intel® Atom N550 Dual Core
320GB
2GB DDR3 RAM
10.1" LED Backlit Widescreen
Windows® 7 Starter Edition
Intel® Graphics Media Accelerator 3150

Laptop Price
Rs 17550

HP Mini 110 -3608TU / 110 -3609TU

HP Mini 110 -3608TU / 110 -3609TU
All the Hp laptops are famous for its features and for its excellent and great quality. The hp laptops are famous for its fast processing speed and its good looks. The HP has introduced a vide range of laptops. Among….
Intel® Atom N570 Dual Core
250GB
1GB DDR3
10.1" LED Backlit Widescreen
Genuine® Windows® 7 Starter Edition
Intel® Graphics Media Accelerator 3150

Laptop Price
Rs 16900

HP Mini 110 -3606TU / 110 – 3607TU

HP Mini 110 -3606TU / 110 – 3607TU
The HP laptops provide various series of laptops with all having great features and attractive looks. All Hp laptops are having an excellent feature that provides people comfort in using.  All Hp laptops because of its great and fast processor….
Intel® Atom N570 Dual Core
320GB
2GB DDR3 RAM
10.1" LED Backlit Widescreen
Free DOS
Intel® Graphics Media Accelerator 3150

Laptop Price
Rs 16000

HP Mini 110 -3605TU

HP Mini 110 -3605TU
Many stylish, attractive with beautiful colors, and portable laptops are provided by Hp. All this laptops is having a great technical features and specification that make HP laptops more popular in market. Among all this laptops the one is HP….
Intel® Atom N570 Dual Core 1.66GHz
250GB HDD
1GB DDR3 RAM
10.1" LED Backlit Widescreen
Free DOS
Intel® Graphics Media Accelerator 3150

Laptop Price
Rs 14800

Hp premium pavilion 630-Core i5 2430M

Hp premium pavilion 630-Core i5 2430M
There are various series of HP laptops available in market all having different features but the laptop provided by Hp company is of good quality and all of them having an excellent speed. And most important is that hp 630….
Intel 2nd generation Core i5-2430M
500 GB hard Disk Drive
2 GB DDR3 RAM
15.6" HP HD LED BrightView LED
Free DOS
No Dedicated Graphics

Laptop Price
Rs 30700

HP Premium Pavilion 630 – Core i5-2410M

HP Premium Pavilion 630 – Core i5-2410M
There are so many laptops available in market but hp provides the laptop that is having the great quality and speed. In all Hp laptops Because of its great and fast processor speed, they are famous in the market. it….
Intel 2nd generation Core i5-2410M
500 GB Hard Disk Drive
2 GB DDR3 RAM
15.6" HP HD LED BrightView LED
Free DOS
No Dedicated Graphics

Laptop Price
Rs 29700

Lenovo S-10-3C 59-070774

Lenovo S-10-3C 59-070774
Lenovo laptops launched its next mini laptop in budget series. Its S-10-3C 59-070774. This ultra portable lightweight laptop by Lenovo is definitely being liked. However the processor presence limits the sell to certain extent. Your documents can be protected in….
Intel Atom Processor N455
250GB Hard Disk
1GB DDR3 RAM
10.1 inch LED backlit screen
DOS Operating system
Graphics Chip by Intel

Laptop Price
Rs 14400

HP Pavilion dv7-6010tx

HP Pavilion dv7-6010tx
HP laptops are very reliable in market. And it’s also one among the highest selling brand in the market. They recently introduced their new product in the Hp pavilion series named HP Pavilion dv7-6010tx. The package is a surprise with….
2nd Generation Core i3-2310M -2.1 GHz/ 3MB Processor
640 GB HDD
4 GB DDR3 RAM
17.3" HD+ LED Backlit Widescreen
Windows 7 Home Premium (64-Bit)
1 GB GDDR5 Dedicated Graphics Radeon 6490M

Laptop Price
Rs 47800

Samsung N148-DP05IN

Samsung N148-DP05IN
Samsung N148-DP05IN is available at a price of budget Smartphone and does the desired for you. It has good overall built and impressive battery backup time. Samsung company fulfilled the expected by presenting a low priced sturdy Mini laptop. The….
Intel Atom N455 Processor
250GB Hard Disk
1GB DDR3 RAM
10.1" LED Backlit
DOS Operating system
No Dedicated Graphics

Laptop Price
Rs 14800

Samsung N100-MA03IN

Samsung N100-MA03IN
Samsung laptops presented their new Mini Laptop Samsung N100-MA03IN in ravishing style. It’s simply great in features and performance- A fine low priced laptop. Operating system is easy to use and has superb multitasking capability. Its power efficient too and….
Intel Atom N435 Processor
320GB Hard Disk Drive
1GB DDR3 RAM
10.1" LED Backlit Display
Meego Operating System
No Dedicated Graphics

Laptop Price
Rs 13300

Monday, 18 June 2012

How to build a Tablet from your personal computer

In this project i used an old Fujitsu Siemens life book S series laptop. It has got a 1 Ghz processor and 256 Mb ram, (not sure about the graphic card but i know its between 8-32 Mb). In this instructable i will show how to do tablet pc the easy way(and the cheapest) , and how to do it hard way (including "touch" screen etc). I personaly did it the hard way about half way and run out of materials and  i decided to finish it the easy way.


In this project you will need: 
 

1.Old laptop
 
2. Soldering iron
3.some wires
4. Basic tools to open up the laptop

And if you are doing the hard way you will also need:
 

6.Lots of straight plastic
 
7.Something to melt down the plastic
8. And for the touch screen i would have used device called Minio Xi (look from google)(and buy from Ebay)  . It is mostly used to make projektor sceen "touch" screen. This device uses infrared to map out where the pen is moving on the screen. I will talk about it later in the quide.

The skils you will need to make this are:
 

1. Soldering
 
2. Plastic soldering
3. Basic knowledge how things work
4. Lots of patience

And of course for the hard way you will also need:
 

5.Problem solving skills
 
6.Serious knowledge how things work
7.Way to know how to make "special" tools
8. Huge amount of patience :D

And sorry for my English its not my main language but i will try to make it readable :D

Step 1Tearing up the laptop


Tearing up the laptop
This is just basic demolition of the laptop.
Decide wich parts you will use in your project and wich you will modify.

Step 2Building the Tablet pc (easy way) Part 1


Building the Tablet pc (easy way) Part 1
Warning!
remember that you are working in sensitive electronic equipment involved. Make sure to ground yourself before you start working. Remember also that the LCD monitor uses veryhigh voltage when turned on. This does not kill you, but hurts a lot.


The basic idea of the easy way is to flip the screen upside down on the laptop chasis.
 
This can be a easy job to do but there is always something that wont fit, work. so you have to make it work or fit or both.
For examble in my case i had to find out how to make the power button to work and fit in so i can power up the pc.
As you can see in the seacond picture i had to solder two wires to the pins in order to get the ON/OFF switch to the other side of the laptop.
After i did that i had to modify the heatsink to fit under the screen 
as you can see in the picture number 5. Without the heatsink the laptop overheats and shuts down
after that i put all in their own place and installed speacers and other things i needed and did a test run as you can see in the last two pictures

Step 3Easy way part 2 (plastic soldering)


iEasy way part 2 (plastic soldering)
when you're at the point when you put all the parts on their places. place the screens original frame on the LCD screen, and try whether it fits right. If you are pleased you can start  plastic soldering.

Heat up the soldering iron about 240 degrees celsius and start welding the plastic together.  

Step 4Easy way part 3


Easy way part 3
and now its ready.  use USB mouse to operate it and on screen keyboard to write

Step 5Now for the hard way


Now for the hard way
after you have extracted the whole computer, fit the necessary components on your computer screen to see how much space you need and how much extra there is and how to make more space.
I had to tear up the battery plastic chasis in order to fit it in the space i had. Use flat screwdriver to do that.
when  done everything needed proceed to the next part.

Step 6Hard way part 2 (Making the tablet pc body)


hard way part 2 (Making the tablet pc body)
This is the part where i had to stop building this one. Mainly reason is that i run out of materials and the seacond reason that i'm too lazy :D But i wil show you how to take it to the end but you will have to use your own brain and imagination to do that.

First of all i started to make the frame to the tablet. i cut the plastic the way i needed it and folded the plastic the way i had to in orded to make the frame to the tablet. the frame is about the size of the screen.
this is where i drop out. You can use plexi glass to make the top and bottom sides to the frame.

And for the touch screen part. I would have used Mimio Xi to do that. It uses one USB  port to power and to work. it uses infrared to map out where the pen is moving. the pen sends infrared to the mimio xi and the mimio calculates where the pen is moving. the pen is like computer mouse but instead moving it on the table you can move it on the screen. The mimio xi Is very expensive to buy but you can find it from the Ebay cheap. and you don't have to buy the whole thing you will only need the same parts shown on the last picture. there is the pen and the receiver. But make sure first that it works on the laptop before building it, because it needs drivers and the software to work. I have one mimio xi my self and its on my video projector screen so i can operate computer from the wall if i have to, and let me tell you. IT IS useless but so cool to use :DD


So this is it this is all the information you need. Have fun Building your own laptop tablet. and Make a post if you did the hard way to the finish. Please RATE AND COMMENT and if there is something bothering PM me and i'l do something about it. Happy building!

Friday, 15 June 2012

Google Operating system


Google's Desktop OS
Click here to view full-size image.What is it? It's everything, or so it seems. Google Checkout provides an alternative to PayPal. Street View is well on its way to taking a picture of every house on every street in the United States. And the fun is just starting: Google's early-beta Chrome browser earned a 1 percent market share in the first 24 hours of its existence. Android, Google's cell phone operating system, is hitting handsets as you read this, becoming the first credible challenger to the iPhone among sophisticated customers.
When is it coming? Though Google seems to have covered everything, many observers believe that logically it will next attempt to attack one very big part of the software market: the operating system.
The Chrome browser is the first toe Google has dipped into these waters. While a browser is how users interact with most of Google's products, making the underlying operating system somewhat irrelevant, Chrome nevertheless needs an OS to operate.
To make Microsoft irrelevant, though, Google would have to work its way through a minefield of device drivers, and even then the result wouldn't be a good solution for people who have specialized application needs, particularly most business users. But a simple Google OS--perhaps one that's basically a customized Linux distribution--combined with cheap hardware could be something that changes the PC landscape in ways that smaller players who have toyed with open-source OSs so far haven't been quite able to do.
Check back in 2011, and take a look at the not-affiliated-with-Google gOS, thinkgos in the meantime.

Upcoming technologies by Intel

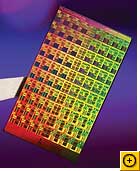
Click here to view full-size image.32-Core CPUs From Intel and AMD
What is it? With the gigahertz race largely abandoned, both AMD and Intel are trying to pack more cores onto a die in order to continue to improve processing power and aid with multitasking operations. Miniaturizing chips further will be key to fitting these cores and other components into a limited space. Intel will roll out 32-nanometer processors (down from today's 45nm chips) in 2009.
When is it coming? Intel has been very good about sticking to its road map. A six-core CPU based on the Itanium design should be out imminently, when Intel then shifts focus to a brand-new architecture called Nehalem, to be marketed as Core i7. Core i7 will feature up to eight cores, with eight-core systems available in 2009 or 2010. (And an eight-core AMD project called Montreal is reportedly on tap for 2009.)
After that, the timeline gets fuzzy. Intel reportedly canceled a 32-core project called Keifer, slated for 2010, possibly because of its complexity (the company won't confirm this, though). That many cores requires a new way of dealing with memory; apparently you can't have 32 brains pulling out of one central pool of RAM. But we still expect cores to proliferate when the kinks are ironed out: 16 cores by 2011 or 2012 is plausible (when transistors are predicted to drop again in size to 22nm), with 32 cores by 2013 or 2014 easily within reach. Intel says "hundreds" of cores may come even farther down the line.

Tuesday, 5 June 2012

How to Change Startup Programs on Your Computer


Is your computer running more slowly than it used to? You may have too many startup programs bogging it down, but follow the steps below and you'll be as speedy as you once were.

EditSteps

  1. 1
    Decide if you want to initiate this process manually or with the help of a program. Either way, you'll need to find out what you can and can't disable. Keep in mind there are many programs written to make this task easier; using a program might save you some time.

GNU/Linux

  1. 1
    Edit the scripts in /etc/init.d. This directory contains a number of start/stop scripts for various services on your computer system.
  2. 2
    Use rcconf if you want software help. This tool configures system services in connection with system runlevels. In other words, it will help you turn services on/off using the scripts in /etc/init.d.
    • If you're running the Ubuntu operating system, you can use the settings from here: System -> Preferences > Startup Applications.

Mac OS X

  1. 1
    System Preferences is inside the black circle.
     System Preferences is inside the black circle.
    Go to your computer's dock and access "System Preferences."
  2. 2
    Click Accounts in the Menu.
  3. 3
    Click the second tab.
  4. 4
    Select the icon you do not want and press the minus button. If you want to add something, press the plus button and select the application.

Microsoft Windows (Manually)

  1. 1
    The PC Review startup programs list page.
     The PC Review startup programs list page.
    Avoid disabling something critical to your system. Before you delete anything, open up a window or tab on your browser to http://www.pcreview.co.uk/startup. This site contains a database of startup programs, and it shows what can be disabled and what shouldn't be.
  2. 2
    Open up the Run dialog box by:
    • Opening the start menu and clicking "Run" or
    • Pressing the Windows Key and "R" at the same time.

      Image:Run-location.jpg
  3. 3
    Type in msconfig in the text box, and click "OK" or press "Enter."
    Image:Msconfig.JPG


    • A dialog box will pop up with various tabs. By default, it's on the General tab.

      Image:Msconfig-2.JPG


  4. 4
    Click on the startup tab. This shows the different programs that start up when you turn on your computer.

    Image:Startup-tab.JPG
  5. 5
    Get to work disabling the programs that you don't want starting up automatically. For example, if you don't want iTunes starting up automatically, just uncheck iTunes.exe. Remember to check the database mentioned in the first step before disabling.

    Image:Disable-startup.jpg
  6. 6
    Click "OK" once you've finished disabling the automatic programs.

    Image:Startup-ok.jpg
  7. 7
    Be aware that startup programs are also stored in a folder called "Startup." Click on the start menu, go to "All Programs," and select "Startup." Chances are that there is nothing in there, but there could be some programs, so it's worth checking.
    • If you don't want any of those programs to start up, simply right-click the file(s) you don't want and select "Delete."

      Image:Startup-folder.jpg

WinPatrol

  1. 1
    www.WinPatrol.com
     www.WinPatrol.com
    Go to http://www.winpatrol.com and download WinPatrol. This is a small, free program that automatically checks the startup programs and lets you disable them.
    • This program has a plus version as well. If you do not get the plus version, you will not be able to see the advanced information on each of the startup programs. That's okay though, you can just go to http://www.pcreview.co.uk/startup and look it up.
  2. 2
    Install the program.
  3. 3
    If it's not already open, follow this path: Start menu -> All Programs -> WinPatrol -> WinPatrol Explorer

    Image:WinPatrol-folder.jpg
  4. 4
    Stay on the startup tab. This is where you need to be.

    WinPatrol at the startup tab.
    • All you have to do is select the programs you don't want and click "Remove" to keep them from automatically starting up. For programs like QuickTime and/or GoogleUpdater that continue to add themselves to the Startup list, use "Disable." When you "Disable" a Startup WinPatrol will remember you don't want it always starting and will automatically remove it when it returns.

      Image:WinPatrol-disable.JPG
  5. 5
    Recover anything you accidentally lose. *If you accidentally remove a startup program using WinPatrol, it can be restored via the History button on the WinPatrol Options tab.

EditVideo


EditTips

  • A free alternative to WinPatrol is Autoruns from the Sysinternals suite. It has the same and more features as Winpatrol and it is free. (Sysinternals is part of Microsoft.)
  • Another totally free software toolbox is CCleaner, available from Majorgeeks.com or from the author at Piriform.com Software. On the Tools tab, you can stop startup programs from running (both ones in the Startup folder and ones starting from elsewhere), as well as uninstall unwanted programs.
  • Be sure to use common sense when disabling the programs. For example, if it's iTunes.exe, you can tell that that is related to iTunes. Just don't overestimate your common sense.
  • If for some reason www.pcreview.co.uk/startup doesn't have what you're looking for, you can always try using a search engine to look for the information you need.