How to Get the Most From Your 3D HDTV
Whether you want to play 3D games or watch the latest 3D blockbuster, you can perform a few simple tricks to optimize your 3D HDTV viewing.
 Gamers, tech enthusiasts, and early adopters were the first to benefit from the shift to HDTV, and now they're reaping the rewards of jumping on the 3D train before everyone else. Good 3D TV programming and Blu-ray movies are still in short supply, but the amount of killer stereoscopic games is growing by the day. In fact, some of last year's biggest games came with support for 3D television sets. But just as in the early years of HD technology, discerning how to get the most out of your cutting-edge tech is no simple task.
We're here to help. If you took the plunge and bought a cutting-edge 3D HDTV, spend a bit of time to implement the following simple tricks, which will help you improve your 3D HDTV viewing.
Use a Backlight
Whether you're playing games or watching Blu-ray movies, you'll probably be using your HDTV in a darkened room to replicate the immersive theater experience, but marathon sessions in front of a bright screen can wreak havoc on your eyes. With 3D activated, most 3D HDTVs run brighter to compensate for the tinted eyewear that makes the 3D effect possible. Prolonged exposure in a darkened room can exacerbate headaches and mental fatigue, but you can fix this glaring issue pretty easily.
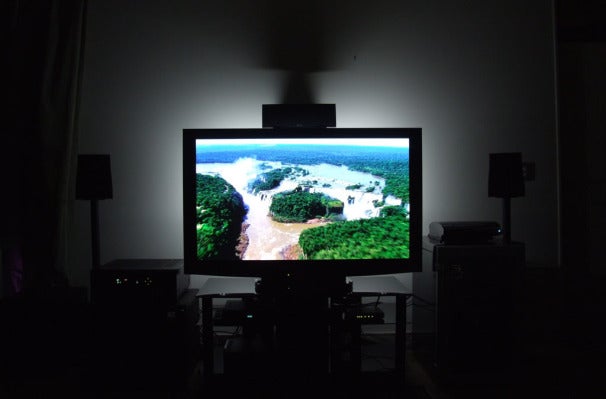
A specialized bias lighting arrangement can subtly improve your 3D home theater setup.
The quick and cheap way to improvise your own backlight is to set up a desk lamp behind your HDTV with the bulb pointed at the wall. If you're really dedicated to the idea, buy a specialized bias lighting device such as the Ideal-Lume to backlight your 3D HDTV with complementary colored lighting, which keeps your display from being the only light-emitting object in the room. An inexpensive bias lighting product will cost you about $50 to $75.
Backlighting helps maintain image quality by providing a neutral reference point, and it reduces eyestrain because your pupils don’t have to dilate and contract rapidly to accommodate quick flashes of light on screen as they would in a pitch-black room.
Calibrate Your Display
The truth is, your new HDTV was not designed to look its best right out of the box. Two identical displays from the same factory (or even the same production line) can differ dramatically in sharpness, brightness, and color quality. TV manufacturers often build screens to fall somewhere within a prescribed range of design specifications to get them out the door and onto the showroom floor, so typically two versions of the same device will have slightly different specs. Dropping serious cash on a THX-certified 3D HDTV is as close as you'll get to having a well-calibrated set out of the box, but even that won't guarantee perfect results. For the best results, calibration is a necessity. Color-calibrating your display is a tedious task that ensures everything looks exactly as intended on your HDTV.
In a perfect world, every display would look the same. But even in an imperfect world, you can calibrate your HDTV to bring it in line with the standard display measurements that the game and filmmaking industries use, so you see images as the content creators intended. Uncalibrated displays make games especially garish: Improperly calibrated brightness, color, and contrast settings cause everything to appear oversaturated, and diminish the impact or intention of beautiful games. For example, the Uncharted games employ oversaturation to subtly inform players that they’re in a dream sequence or a flashback. If your HDTV isn't calibrated correctly, you’re missing out on details the game developer wanted you to see.
You could pay a professional to come out and calibrate your HDTV, but it's pretty easy (and significantly cheaper) to do it yourself. The PCWorld Labs team uses professional calibration tools from Sencore to make sure that each set that passes through for testing is calibrated correctly, but the combination of tools they use can be cost-prohibitive for most users.
 Though professional calibration can cost hundreds of dollars, you can get 95 percent of the way to HDTV perfection with a do-it-yourself calibration disc. After calibrating each set in the PCWorld Labs, the staff verifies each calibration using a Digital Video Essentials Blu-ray disc, which costs around $20 and is also available as a standard DVD.
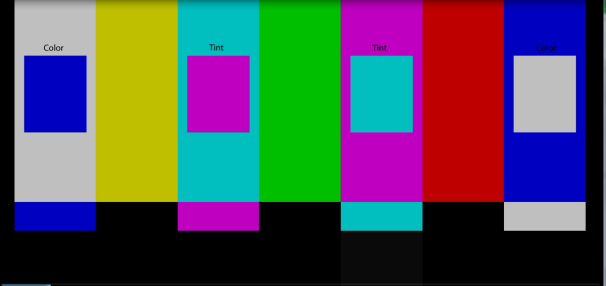
Personally, I recommend the Spears & Munsil High Definition Benchmark Blu-ray Edition, which is easy to use. I've had great results time after time on each TV I calibrate with this Blu-ray, and the various test patterns help you determine how all the arcane video settings in your TV's menus affect image quality.
The drawback with the Spears & Munsil disc is that it's exclusively for Blu-ray; unlike the similar Digital Video Essentials disc, it can’t help you adjust your HDTV if your input device of choice (Apple TV, Roku, Xbox 360) can't read Blu-ray discs. Even if you happen to own a Blu-ray device such as a PlayStation 3, calibrating your HDTV using your PS3 and then using the same settings for input from other devices isn’t accurate because each device outputs video information in a different way.
If you can't take advantage of the HD Benchmark Blu-ray, try the free AVS HD 709 disc from the AVSForum. Simply download the appropriate version of the AVS HD 709 calibration program for your device (you probably want the .mp4 version), burn it to a disc that your HD input device can read, and you're good to go. You can even stash the calibration program on a flash drive and run it directly on your HDTV if the set happens to carry a USB port. The free version of AVS HD 709 has the basic test patterns you’ll need for setting brightness, contrast, and color, but it lacks the video sample material and advanced patterns found on the Spear & Munsil disc.
Customize the Depth Intensity of Movies and Games
Now that you've properly calibrated your TV, it's time to mess around with the 3D settings of your input device. Every game or movie handles 3D content differently: While most 3D films maintain static depth settings, 3D games often have their own unique "sweet spot" for depth effects. For optimal 3D gaming, you may need to adjust the depth effects individually for every game you own--and certain games actually look better with the depth setting turned down.While it seems counterintuitive to have the perceived depth of your 3D HDTV configured at anything less than 100 percent, maxing this setting out can make many 3D games look worse. For example, maxing out the 3D depth slider for Crysis 2 produces a nasty graphical corruption known as "crosstalk," which causes ephemeral outlines to appear around many geometrical shapes in the game.
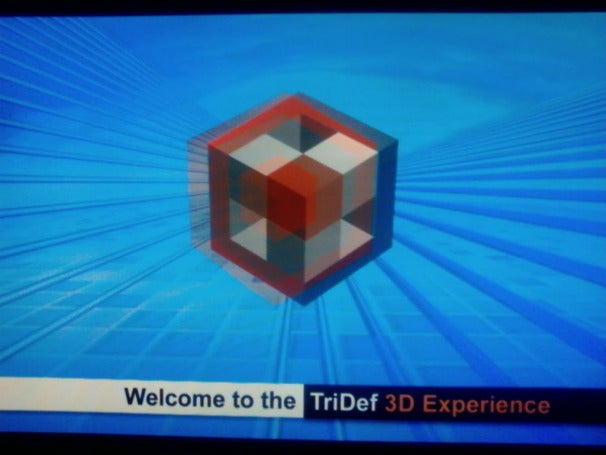
 This is what crosstalk looks like. Prevent crosstalk in games and movies by adjusting depth intensity.
Stereoscopic 3D tricks your brain into thinking it's seeing multidimensional scenes by offsetting two identical images; crosstalk occurs when those two images don't line up right, which can happen at different levels of depth intensity depending on the game or movie you're enjoying. And crosstalk isn't the only problem you can eliminate by adjusting the depth intensity: During our impromptu 3D depth testing while playing games on a Panasonic GT25 plasma 3D HDTV, fine details such as chain-link fences in Gears of War 3 became jagged when we maxed out the depth setting, and text in Assassin's Creed Revelations became blurry and pixelated.
During our testing, we found that setting the depth intensity of most 3D games between 0 and 5 percent kept crosstalk at a minimum without sacrificing much of the depth effect. That may not be the best setting for you, depending on the kind of 3D display you own and your own personal comfort zone, so make sure to fiddle around with the 3D settings in your games and movies to find the perfect fit.
A final note: Most 3D HDTVs have a specific set of menu options for 3D adjustment that range beyond simple depth intensity sliders; don't be afraid to poke around in there. For example, during testing we discovered a few settings on our Panasonic GT25 plasma that dramatically improved every 3D game we played, something we hadn't encountered before despite having owned the 3D HDTV for nearly a year.


0 comments:
Post a Comment